Contact Us

If you still have questions or prefer to get help directly from an agent, please submit a request.
We’ll get back to you as soon as possible.

Please fill out the contact form below and we will reply as soon as possible.

  • Contact Us
  • Home
  • Administrator
  • Messaging

Assigning a Message to a Service

Written by Pat Parkhill

Updated at August 4th, 2025

Contact Us

If you still have questions or prefer to get help directly from an agent, please submit a request.
We’ll get back to you as soon as possible.

Please fill out the contact form below and we will reply as soon as possible.

  • Administrator
    Quick Start Contact Management Campaign Management Monitoring Reporting & Analytics CRM Agent Desktop SMS Messaging Attempt Supervisor SpeechIQ Script Email Chat Ticket BI (Business Intelligence) Wallboards API Voice
  • Agent
    Getting Started Using the Agent Desktop Understanding Your Agent Role
  • Troubleshooting
    Diagnostic Tools Error Messages Agent Desktop Troubleshooting Call, Email, or SMS Troubleshooting Reporting & Analytics Troubleshooting Community-Customer Service
+ More

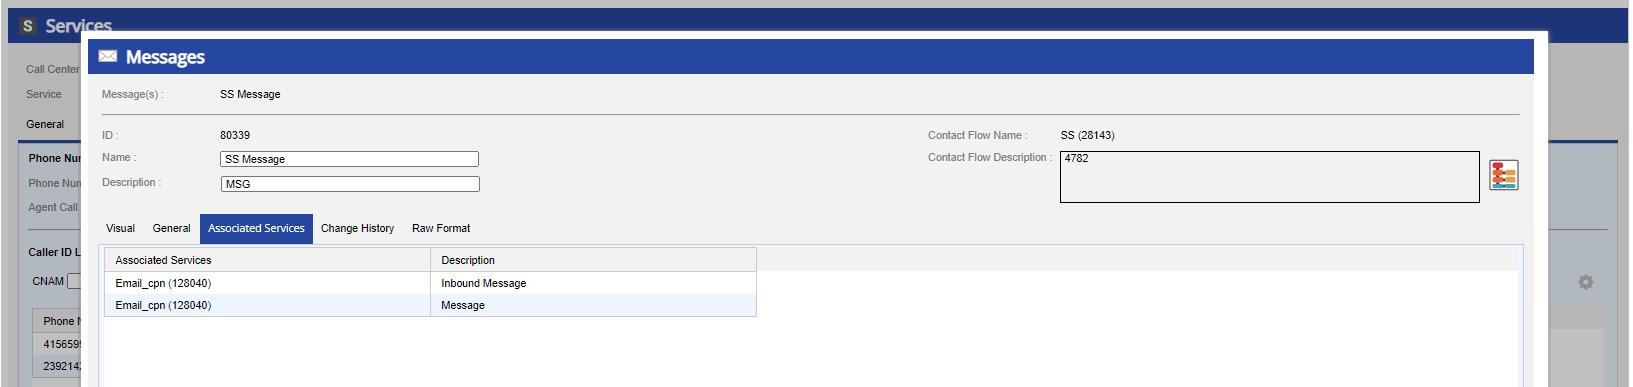
After you create and deploy a message, you must assign it to a service to ensure that the contact flow behaves as expected. This topic describes how to assign a message to inbound and outbound services using the Services editor.

Delete

Note

You can assign a message to more than one service. However, each service can only have one associated message.

  1. In the LiveVox Portal, navigate to the Services editor by selecting Configure > Services > Services. 
  2. Select the required Call Center and Service values from their respective drop-down menus.
  3. To assign a message to an outbound service, click the Messaging tab.


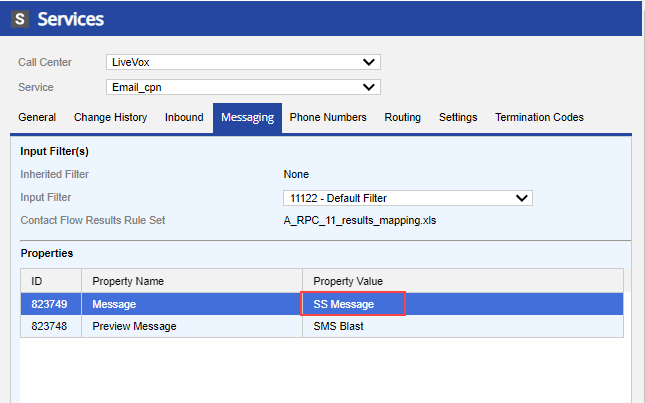
    1. In the Properties table, double-click the Message property field. 
    2. In the Edit Property(s) window, select the required message from the drop-down menu for the Property Value field. 
    3. Click Ok, then click Save.
  4. To assign a message to an inbound service, click the Phone Numbers tab.


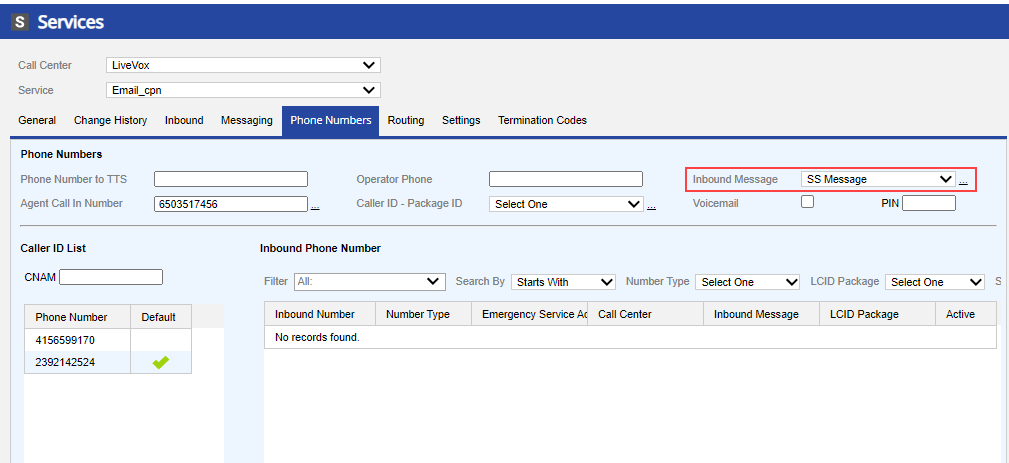
    1. Select a message from the Inbound Message drop-down menu. 
    2. Click Save.

      Delete

      Note

      To view the selected message in the Messages editor and view associated services, click the ellipsis next to the drop-down menu.


Was this article helpful?

Yes
No
Give feedback about this article

Related Articles

  • Creating a Contact Flow
  • Changing the Verbiage of a Message
  • Assigning a Contact Flow to a Service

Copyright 2025 – testcompanylivevox.

Knowledge Base Software powered by Helpjuice

Expand