Design Tab Overview for Script

Written by Pat Parkhill
Updated at August 4th, 2025
You can create and design the page in the Design window.
 The window contains the following options:
Elements
The script builder toolbar provides access to the data elements and data control types that are used for displaying and capturing data within a script. You can insert the controls into a script by dragging and dropping the control to the script editor. The following controls are available:
- Button: Enables you to create a button on the agent desktop. This button can be connected to a business rule, internal function, or navigation.
- CheckBox: Enables you to create a single checkbox or a set of checkboxes on the agent desktop so that the agents can select multiple items or responses.
- Radio: Enables you to create a single radio button or a set of radio buttons on the agent desktop. These radio buttons, when completed, become mutually exclusive so that only one response can be accepted at a time.
- Number: Enables you to create a field for capturing numeric responses.
- Money: Enables you to create a field for capturing the amount.
- Date: Enables you to create a field that uses a calendar for capturing a date.
- Time: Enables you to create a field that uses a drop-down list for capturing the time.
- Text: Enables you to place a text field onto the agent desktop.
- Protected: Enables you to create a text field that hides (or covers) the data as it is being entered.
- TextArea: Enables you to place a large text area onto the agent desktop.
- URL: Enables you to create a field for capturing a URL. When using this control, the script runs a check to ensure that the input in this field is formatted correctly for a URL.
- Email: Enables you to create a field for capturing an email address. When using this control, the script runs a check to ensure that the input in this field is formatted correctly for an email address.
- ListBox: Enables you to create a list of items that can be selected on the agent desktop.
- ComboBox: Enables you to create a large list of items that can be viewed within a drop-down box and scrolled with sliders.
- Label: Enables you to create a label for a field or object on the agent desktop.
CRM
You can add the CRM elements to your page. You have Contacts, Accounts, and Tickets options present in the Design tab. To add any of the elements, you must drag and drop the elements to the design area.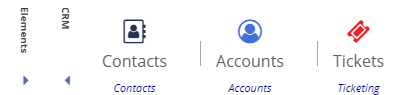
Image
The Images option of the Designer window enables you to include images in the design area. The Image must be available in the Image Library tab, you can add images using the Upload button in the Image Library tab. After the images are uploaded they appear in the Images option in the Design tab. 