Switching the State or Service of Agents

Written by Pat Parkhill
Updated at August 4th, 2025
Using the LiveVox Portal (LVP), you can change the state of your agents who are logged in to the agent desktop from the Ready state to the Not Ready state and vice versa. In addition, you can change the service that your agents selected when they logged in to the agent desktop.
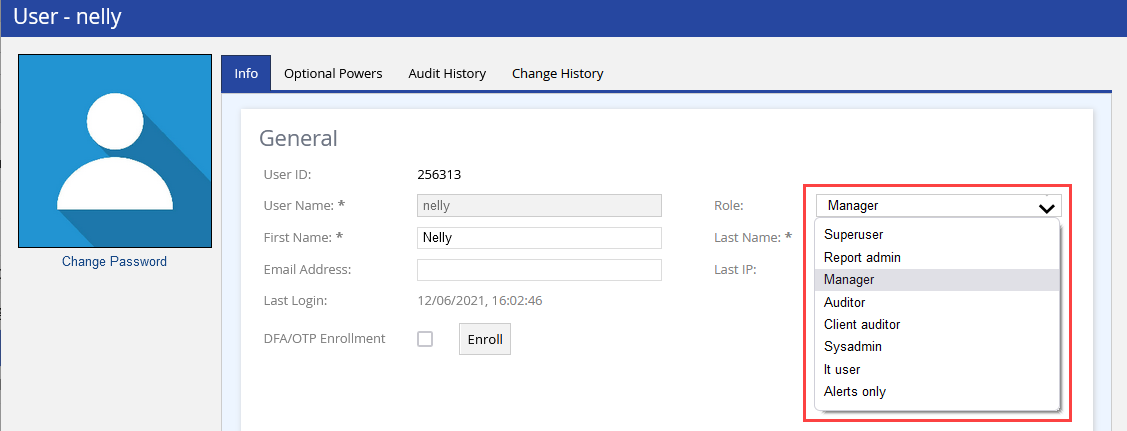 U19 User Window
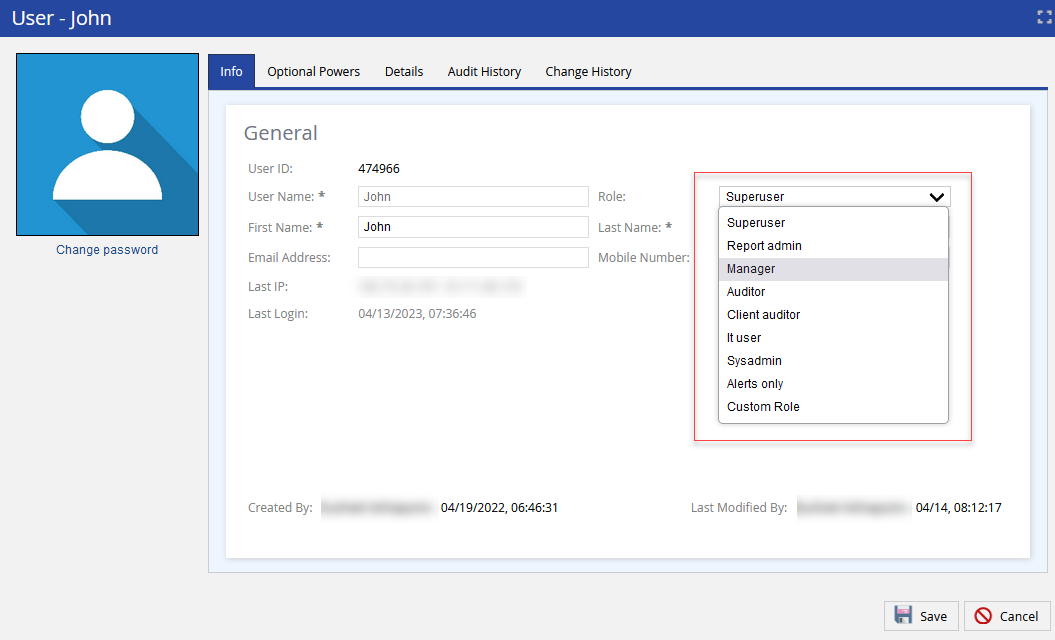
U17
Switching the State of Agents
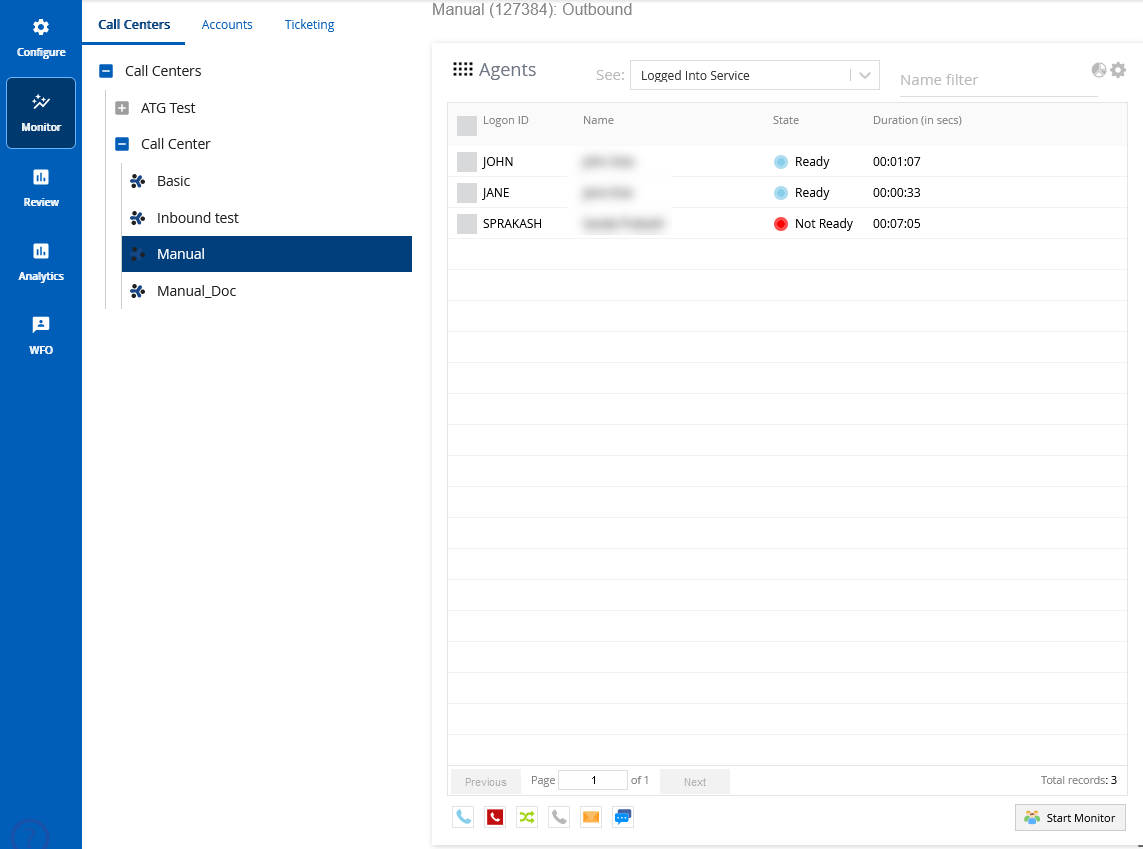
To switch the state of one or more agents to Ready or Not Ready:
- Log in to LVP.
- Access the Monitor dashboard at the required level (enterprise, call center, or service).
- In the Voice section, as required, click one of the following tabs: Outbound, Blended, Inbound
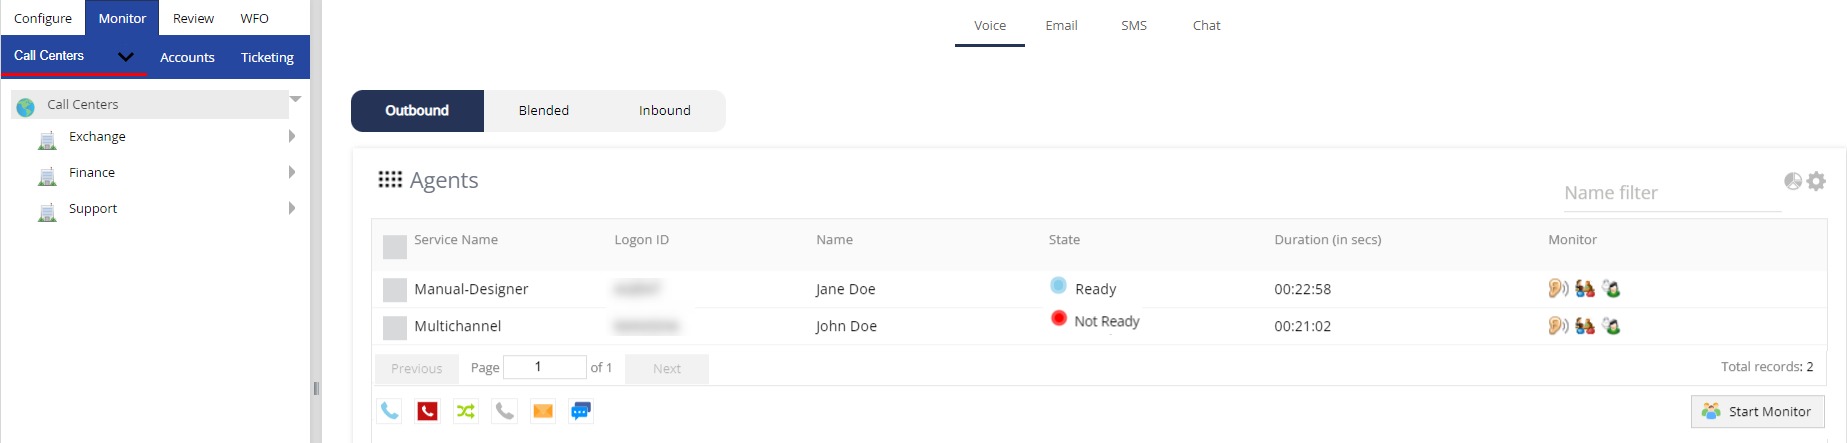
- Ensure that the Agents widget appears in the tabular format.Delete
If the Agents widget does not appear in the tabular format, click the Flip to Table View icon
 on the widget.
 -
In the rows displaying the names of the agents whose state you want to change, select the checkboxes, and then, as required, click the Ready icon
 or the Not Ready icon
  .
.
The Agent Panel window appears.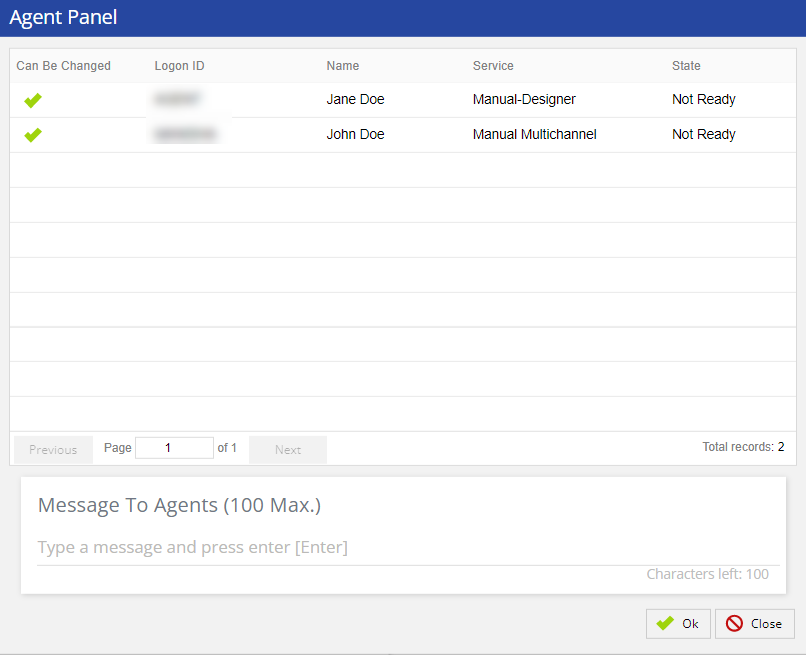 Delete
- The Can Be Changed column indicates if you can switch the state of an agent. For a given agent, if this column does not contain a checkmark, you cannot switch the state of the agent.
- When switching the state of the agents to Not Ready, the Reason Code field also appears in the Agent Panel window. This field contains the following options: Break, Lunch, Meeting, Other, Tech Difficulties, and Training
- If you are switching the state of the agents to Not Ready, in the Reason Code field, select the reason for switching the state to Not Ready.
- Optional: In the Message to Agents field, enter your message to the agents, stating the reason for switching their state.
- Click Ok.
A message appears to indicate if the state of the agents was switched.DeleteIf you entered a message in the Message To Agents field, your message appears on the Agent Desktop of the agents, along with your name and the time that the state of the agents was switched.
Switching the Service of Agents
To switch the service of one or more agents:
- Perform Steps 1 through 4 of the previous section.
- In the rows displaying the names of the agents whose service you want to change, select the checkboxes, and then click the Switch Service icon
 .
.
The Agent Panel window appears.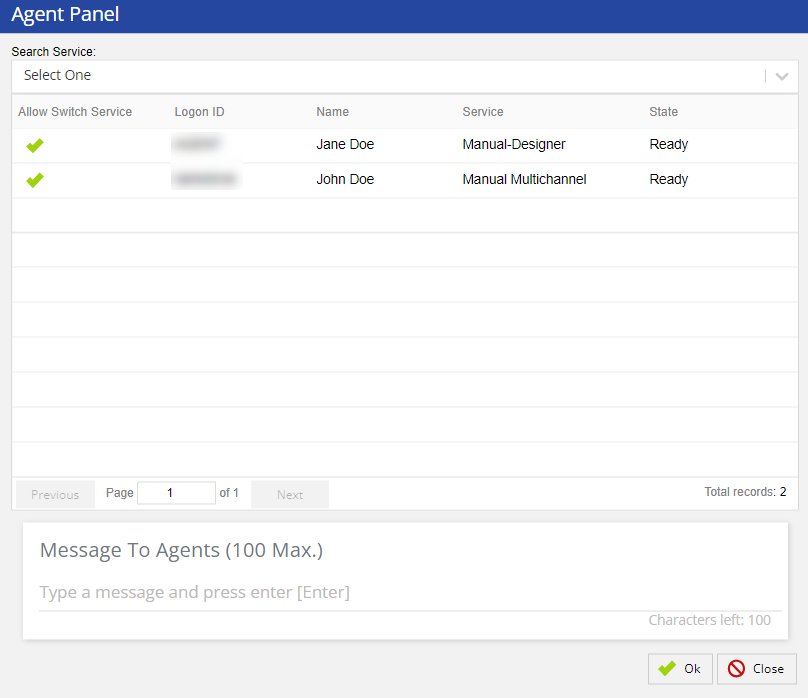
- In the Search Service field, select the service to which you want to switch the agents.
- Optional: In the Message to Agents field, enter your message for the agents, stating the reason for switching their service.
- Click Ok.
A message appears to indicate if the service of the agents was switched.Delete- If an agent is in the Ready or Not Ready state, the agent is immediately switched to the new service. If the agent is in any other state, the agent is switched to the new service only after the agent has changed their state to either Ready or Not Ready.
- If you entered a message in the Message To Agents field, your message appears on the Agent Desktop of the agents, along with your name and the time that the service of the agents was switched.
U19
Switching the State of Agents
To switch the state of one or more agents to Ready or Not Ready:
- Log in to LVP.
- Access the Monitor dashboard at the required level (enterprise, call center, or service).
- In the Voice section, as required, click one of the following tabs: Outbound, Blended, Inbound
- Ensure that the Agents widget appears in the tabular format.Delete
If the Agents widget does not appear in the tabular format, click the Flip to Table View icon
on the widget. -
In the rows displaying the names of the agents whose state you want to change, select the checkboxes, and then, as required, click the Ready icon
or the Not Ready icon .
The Agent Panel window appears.Delete- The Can Be Changed column indicates if you can switch the state of an agent. For a given agent, if this column does not contain a checkmark, you cannot switch the state of the agent.
- When switching the state of the agents to Not Ready, the Reason Code field also appears in the Agent Panel window. This field contains the following options: Break, Lunch, Meeting, Other, Tech Difficulties, and Training
- If you are switching the state of the agents to Not Ready, in the Reason Code field, select the reason for switching the state to Not Ready.
- Optional: In the Message to Agents field, enter your message to the agents, stating the reason for switching their state.
- Click Ok.
A message appears to indicate if the state of the agents was switched.DeleteIf you entered a message in the Message To Agents field, your message appears on the Agent Desktop of the agents, along with your name and the time that the state of the agents was switched.
Switching the Service of Agents
To switch the service of one or more agents:
- Perform Steps 1 through 4 of the previous section.
- In the rows displaying the names of the agents whose service you want to change, select the checkboxes, and then click the Switch Service icon .
The Agent Panel window appears.
- In the Search Service field, select the service to which you want to switch the agents.
- Optional: In the Message to Agents field, enter your message for the agents, stating the reason for switching their service.
- Click Ok.
A message appears to indicate if the service of the agents was switched.Delete- If an agent is in the Ready or Not Ready state, the agent is immediately switched to the new service. If the agent is in any other state, the agent is switched to the new service only after the agent has changed their state to either Ready or Not Ready.
- If you entered a message in the Message To Agents field, your message appears on the Agent Desktop of the agents, along with your name and the time that the service of the agents was switched.