Capturing an Agent Desktop Native (ADN) Log
How to pull Network and Console logs within the Agent Desktop Native (ADN) application

Written by Pat Parkhill
Updated at August 4th, 2025
Note
For information on what Network and Console logs (also known as F12 logs) are used for at LiveVox, take a look at our instructions for pulling them in a traditional web browser.
If you are utilizing the Agent Desktop Native (ADN) application to access LiveVox, you may be required to capture diagnostic logs within the application for troubleshooting. These logs are made up of both Network and Console logs, similar to what is captured in a web browser (such as Google Chrome, Mozilla Firefox, etc.).
Because Agent Desktop Native (ADN) is proprietary software, we've provided step-by-step instructions on how to access the developer console and how to pull/save the logs to your desktop.
Toggling the Developer Tools in Agent Desktop Native (ADN)
In order to access Network and Console logs within Agent Desktop Native (ADN):
-
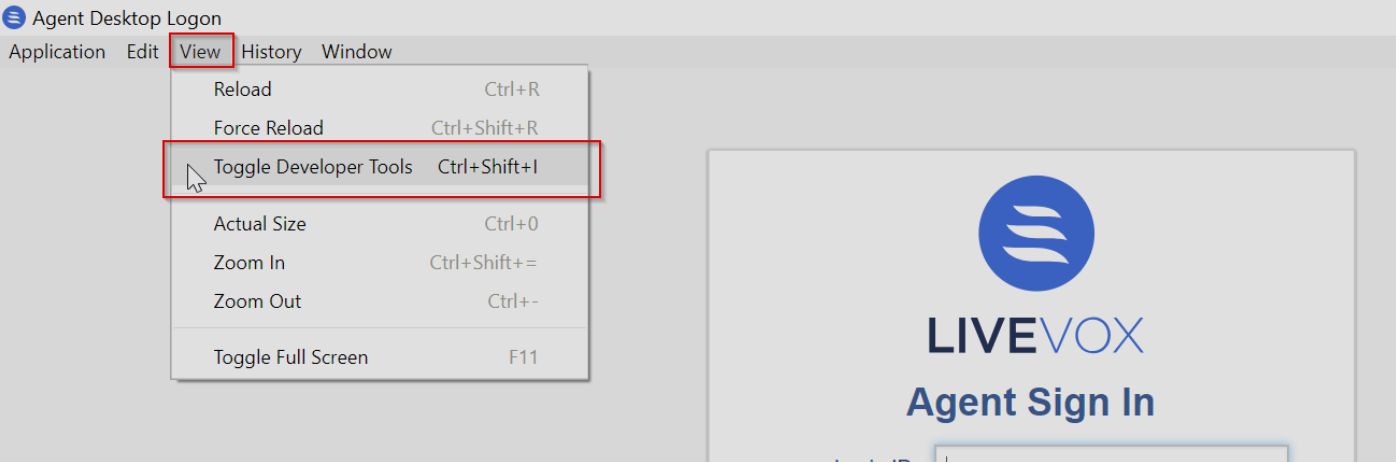
Click on the View button in the menu bar at the top of the application and select Toggle Developer Tools (Ctrl + Shift + I on Windows).
-
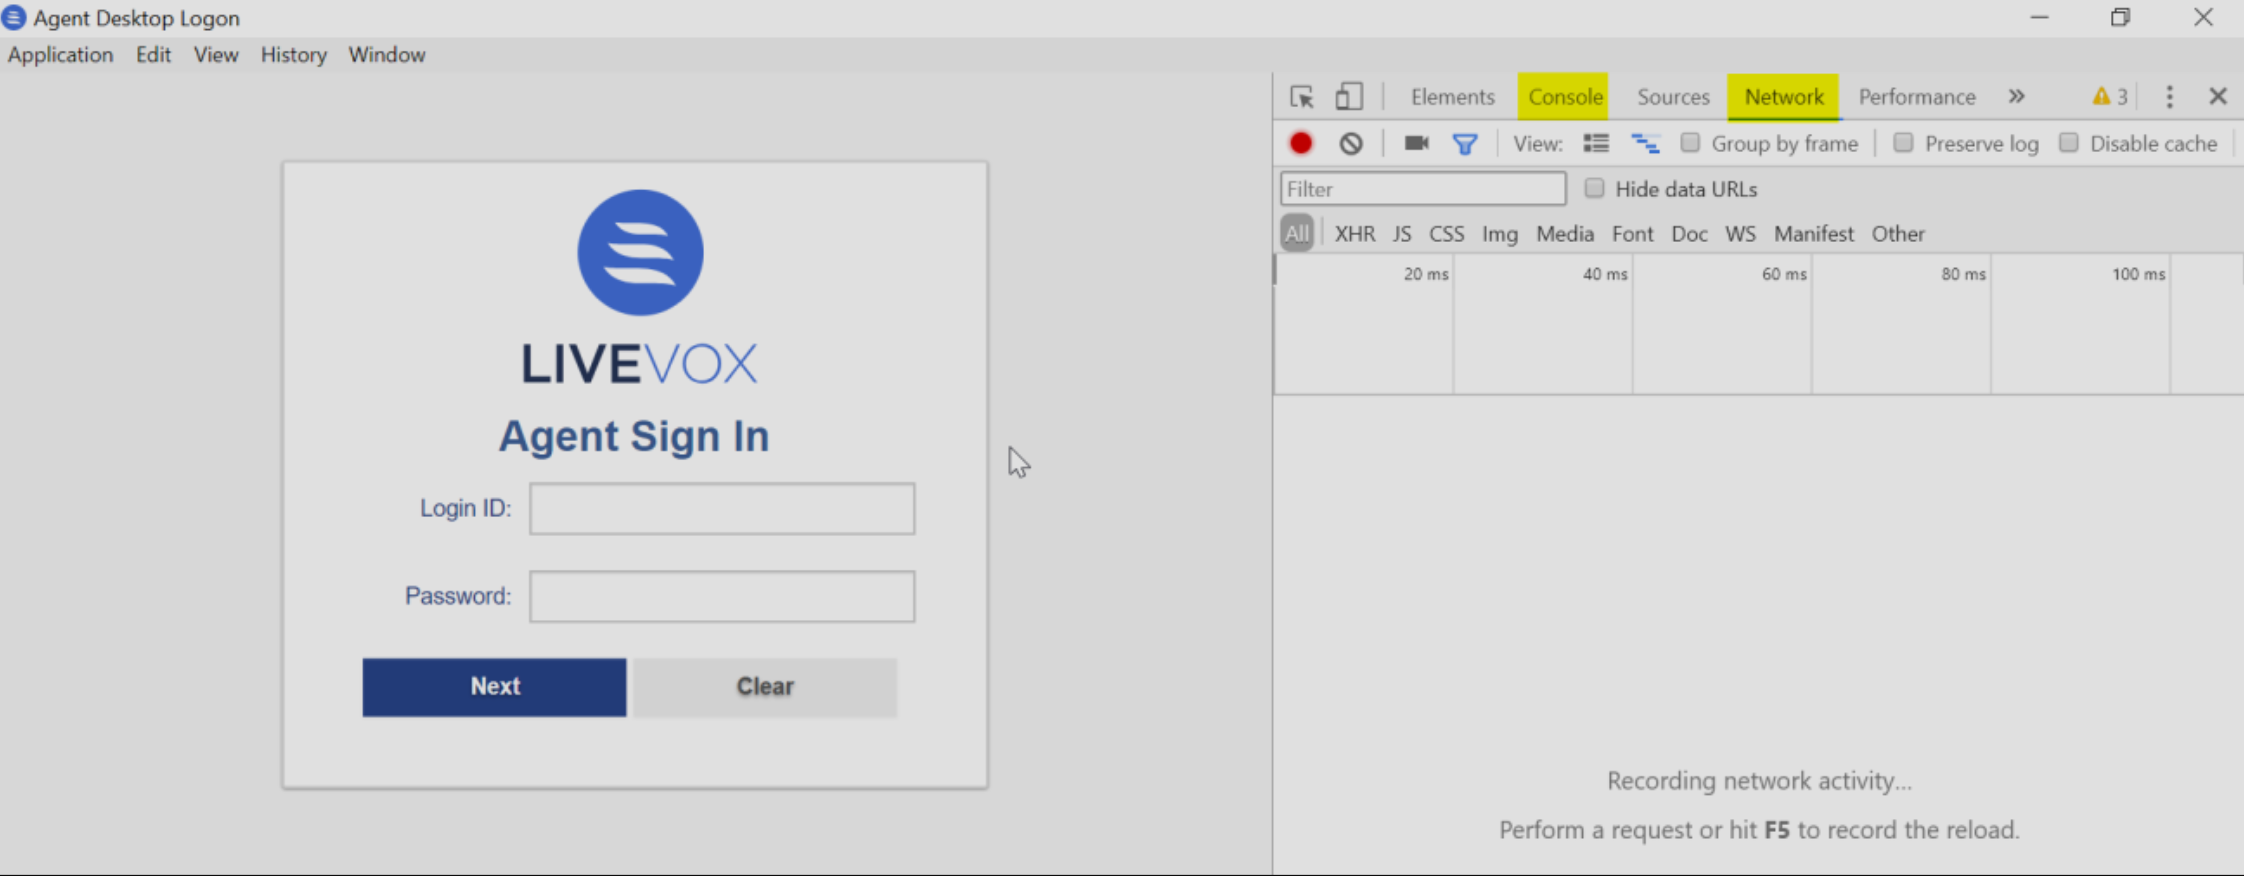
After toggling the tool, you will see a pane showing several tabs. Locate the Network and Console tabs:
-
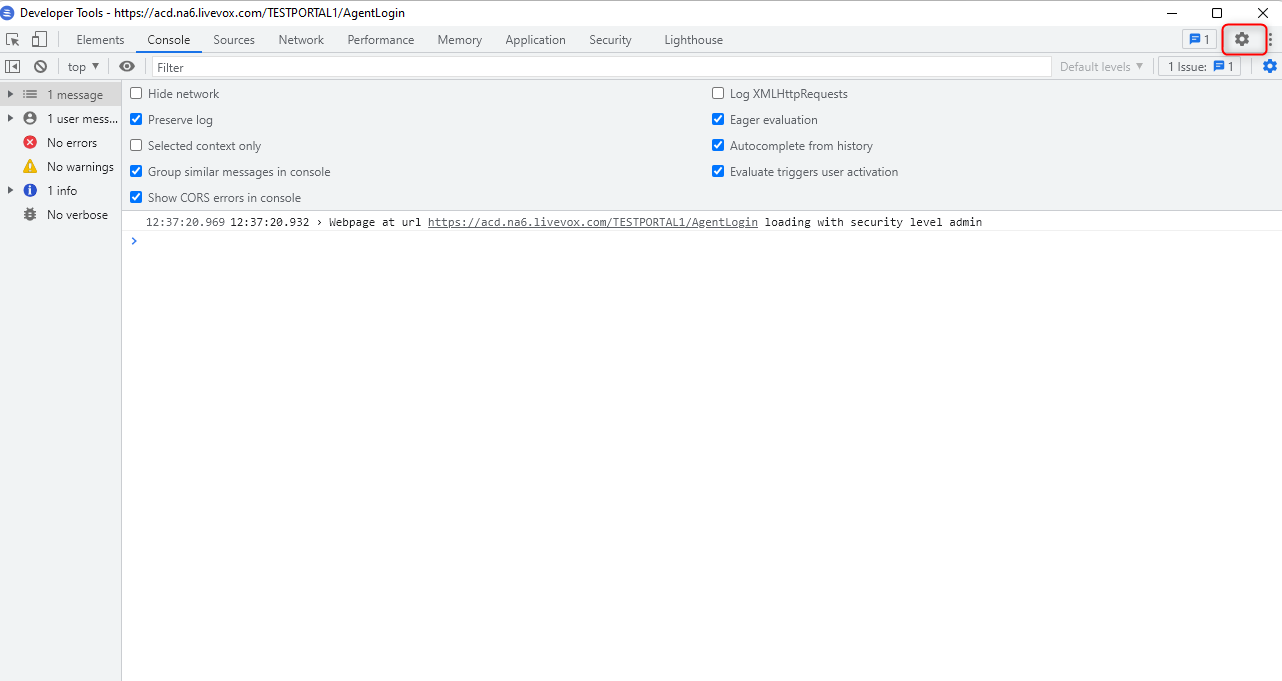
Before capturing the logs, you'll need to enable a few settings. Navigate to the Wheel icon at the top-right:
-
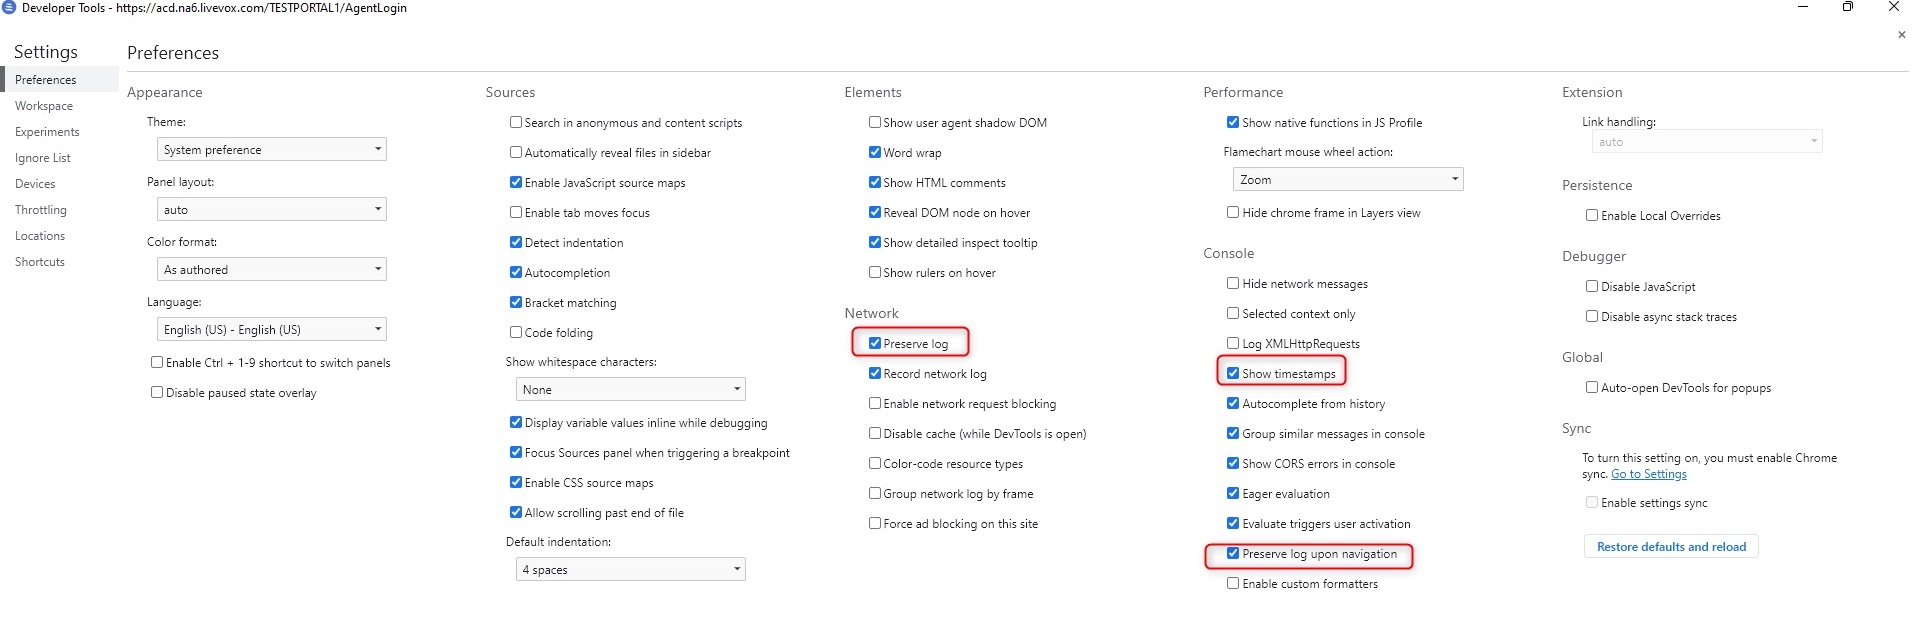
Enabled Preserve Log, Show Timestamps, and Preserve Log Upon Navigation:
Capturing the Logs
Network Logs
- Click on the Network tab.
- Attempt to replicate the problem. Perform the action within the Agent Desktop Native (ADN) application that is causing the issue to occur.
-
Once you've experienced the problem, Save the logs as an .HAR file. To do this, right-click anywhere in the Network tab pane and select Save as HAR with content from the drop-down menu:
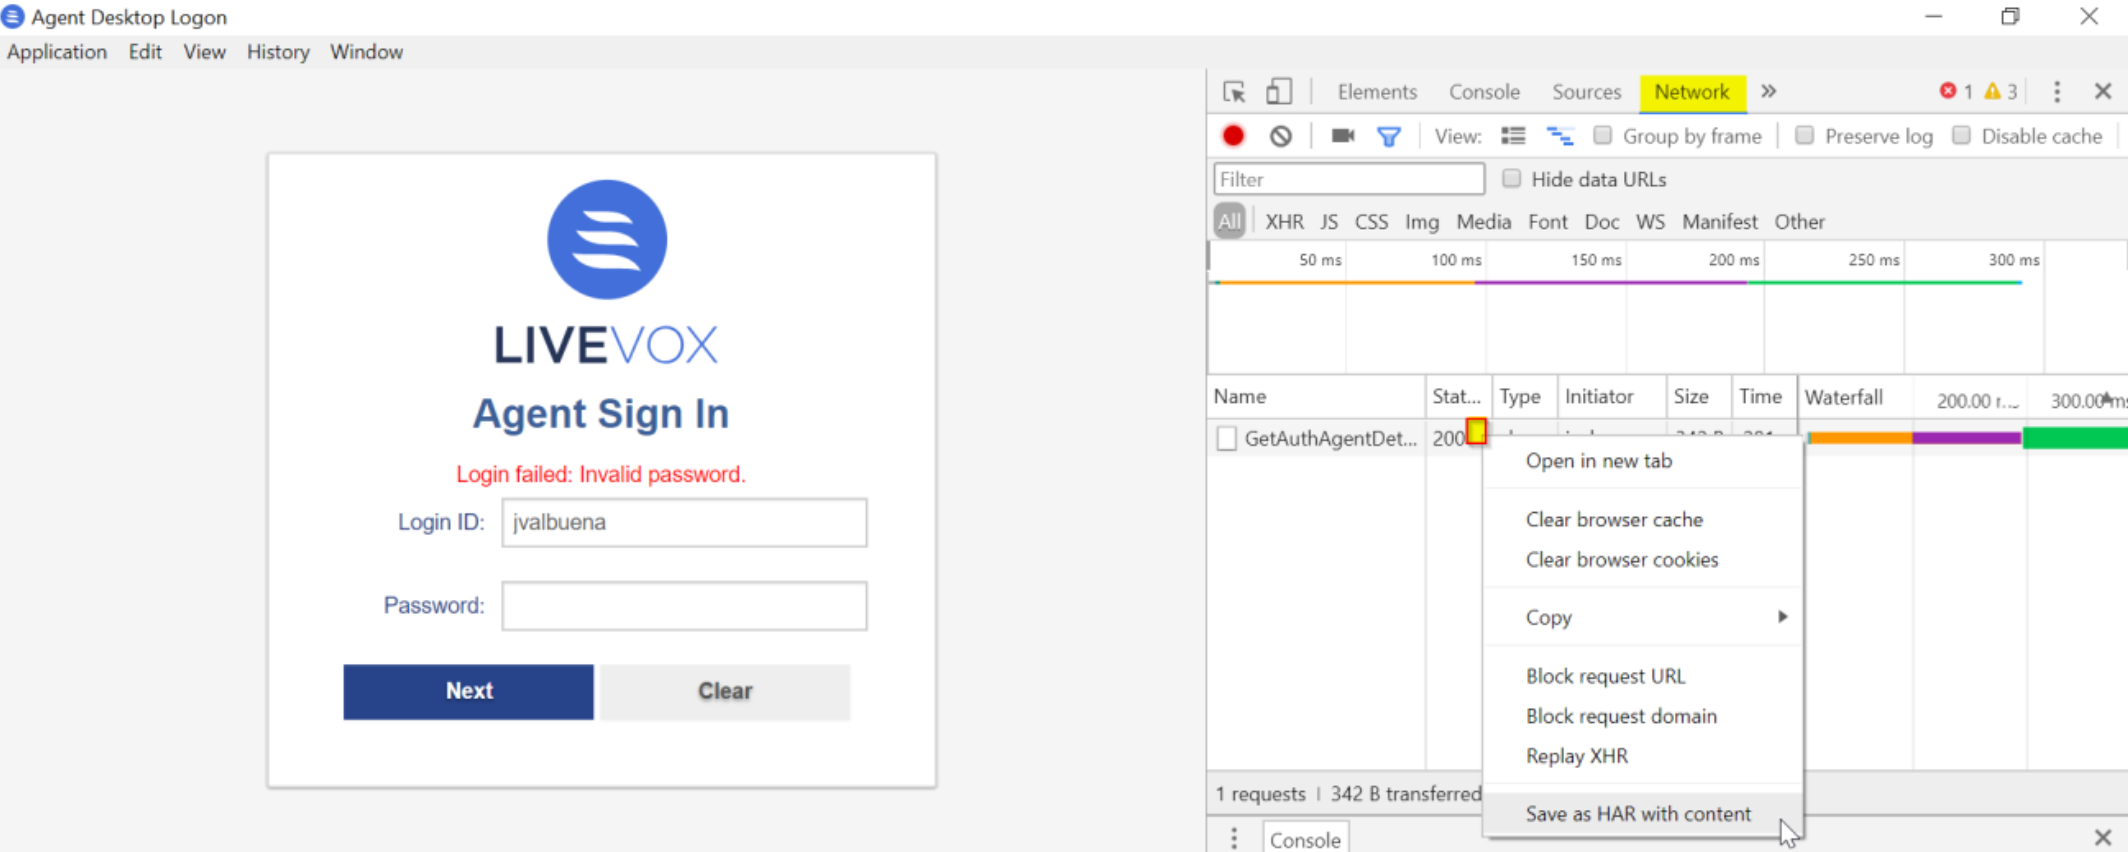
- Save the HAR log to your preferred destination on your computer. This file can then be sent to the LiveVox Customer Care team for analysis.
Console Logs
- Click on the Console tab.
- Attempt to replicate the problem as you did with your Network log capture. Perform the action within the Agent Desktop Native (ADN) application that is causing the issue to occur.
-
Once you've experienced the problem, right-click on the pane and select Save As from the drop-down menu:
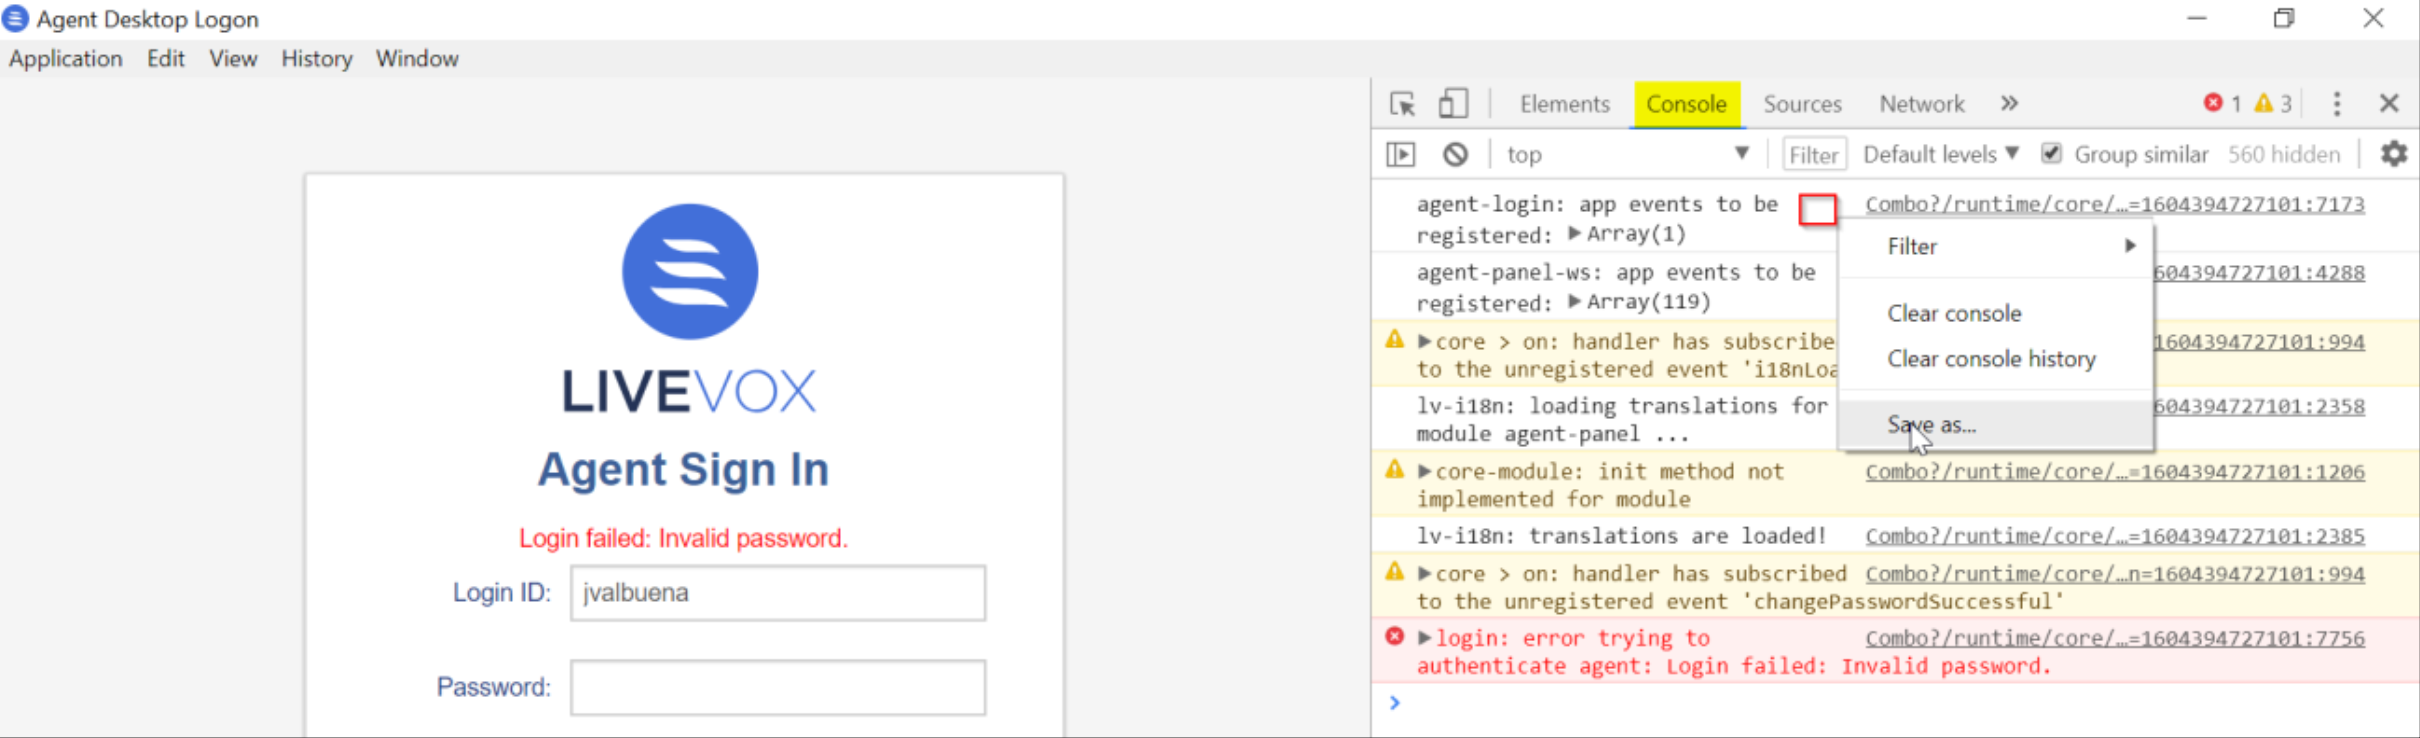
- Save the Consolelogs as a .TXT file in your preferred location on your computer. This file can be sent to the LiveVox Customer Care team for analysis
Clearing Site Content
As in a traditional web browser, you may clear both cache and cookies in Agent Desktop Native (ADN). This can be a valuable troubleshooting step in traditional browsers, but should only be attempted in Agent Desktop Native (ADN) when specifically instructed by our LiveVox Customer Care team resources.
- Click on the View button in the menu bar at the top of the application and select Toggle Developer Tools (Ctrl + Shift + I on Windows).
- Select the Application tab.
-
Click on Clear storage and then Clear site data:
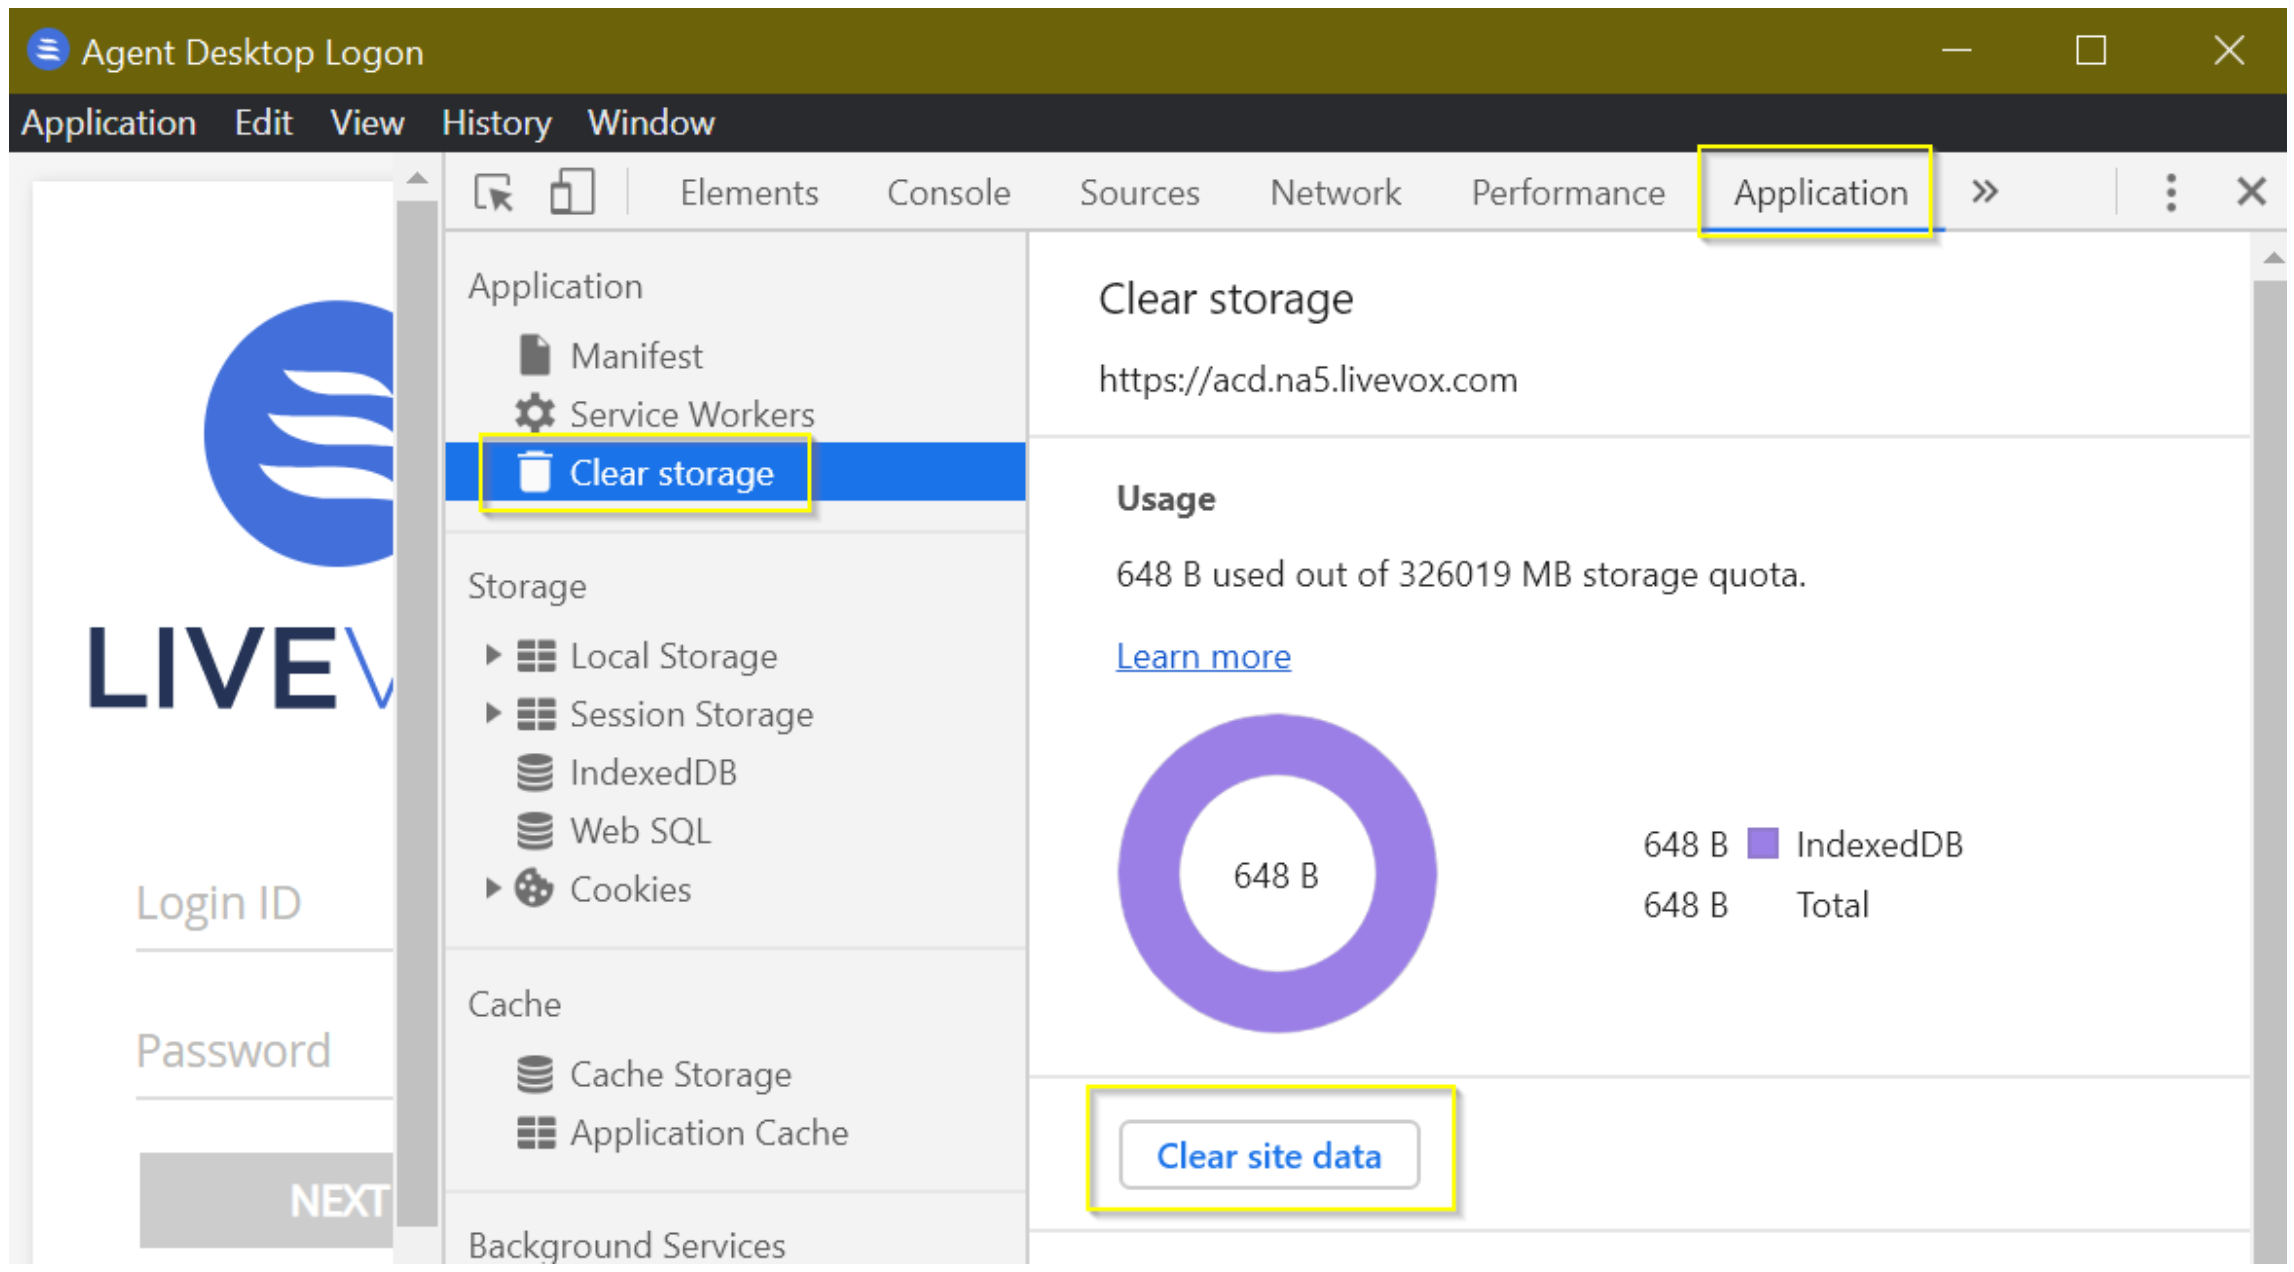
- Reload the application once this has been completed.