Creating a Contact Import Job

Written by Pat Parkhill
Updated at August 4th, 2025
A contact import job helps you to automate the process of importing contact records from a file into Contact Manager on the LiveVox Portal (LVP).
This article describes how to create a contact import job.
Before You Begin
- Upload the contact file to the SFTP site.
- Create an input filter for importing contacts.
Uploading the Contact File to the SFTP Site
Before you create a contact import job, upload the file containing the contact records to the LiveVox SFTP site.
To upload the contact file to the SFTP site:
- Log in to LVP.
- On the Configure tab, click Input / Output > SFTP Browser.
The SFTP Browser window appears. - Expand the parent folder, click contactImport, and then click Upload.
The Upload a File window appears.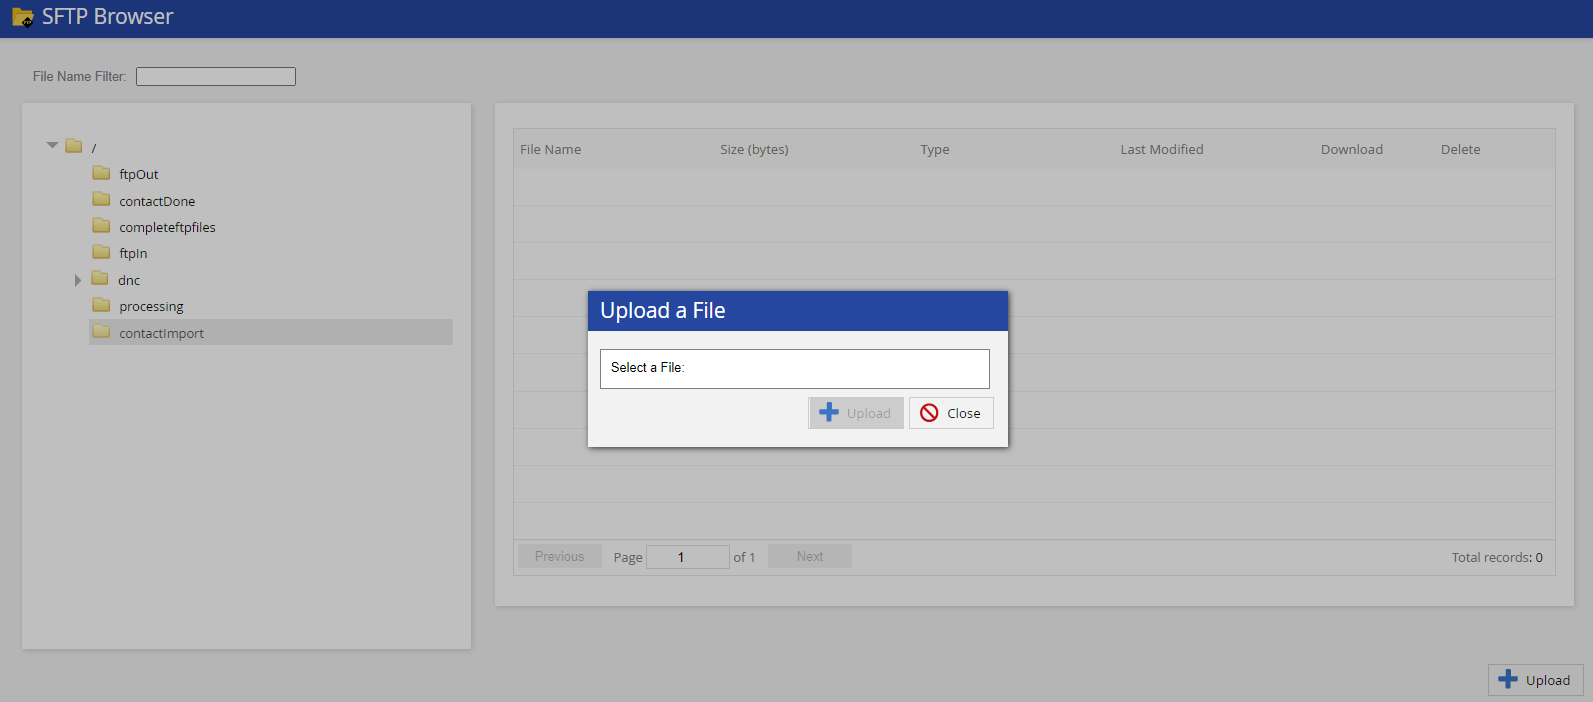
- Select your file by clicking Select a file, and then click Upload.
A message stating that the file is uploaded appears.
Creating an Input Filter for Importing Contacts
Procedure
To create a contact import job:
- On LVP, on the Configure tab, click Contacts > Contacts.
The Contacts window appears. - On the Import/Export Jobs tab, click Add. The Jobs window appears.
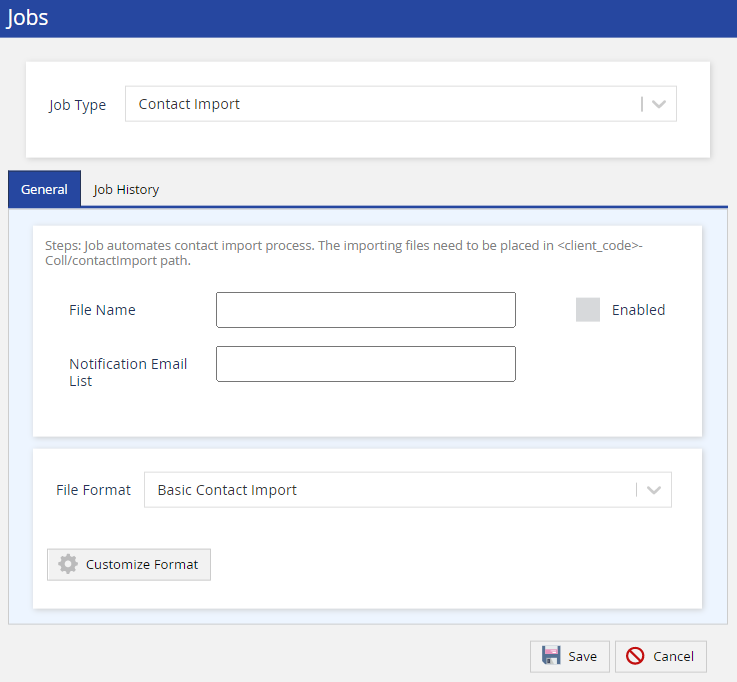
- Specify values in the following fields:
- Job Type: Select Contact Import.
- File Name: Enter the pattern that matches the name of the file containing the contacts that you want to import. A file-name pattern refers to the format of the file name. For information about file-name patterns, see the More on File-Name Patterns section of this article.
- Enabled: Select this checkbox to activate the job.
- Notification Email List: Enter the email addresses to which you want to send a success or failure notification for each import attempt. Separate multiple email addresses with a comma (,).
-
File Format: Select the input filter you created.

- Click Save.
A message stating that the contact import job is created appears. - After five minutes, refresh the window. All the contacts in your file are imported to LVP, and they appear on the Contacts tab of Contact Manager.
More on File-Name Patterns
- An asterisk ( * ) in the pattern indicates a wildcard at the beginning or end of the pattern. For example, the pattern *contacts indicates that the file name ends with contacts.
- A question mark ( ? ) in the pattern indicates a character placeholder, regardless of the type of character and its casing (that is, lowercase or uppercase). For example, the pattern ????_* indicates that the file name begins with four characters that are followed by an underscore ( _ ).
- A pipe ( | ) in the pattern indicates an OR logical separator. For example, the pattern email*|sms*|*voice indicates one of the following:
- The file name begins with email.
- The file name begins with sms.
- The file name ends with voice.